Manipulating Images From the Command Line
I do have Pixelmator on my Mac, but I am not much of an image-editor person. I can find my way around it when I have to, yet most of the image work I actually do is boring and repetitive: resize this, crop that, shave a few hundred kilobytes off a file, turn an SVG into a PNG. None of that needs a mouse, and sometimes you can be faster without a mouse if you know what you are doing. All of it can be a one line command you can rerun, script, and remember.
This post is a tour of the tools I reach for, built around a real example from last week: I had a nice app icon with an AI watermark stuck in the corner, and I wanted it gone without opening an editor.
The two tools
You only need two things, and on a Mac you already have one of them.
- ImageMagick is the swiss army knife. The
modern command is
magick(older systems call itconvert). Install it withbrew install imagemagick. sips(Scriptable Image Processing System) ships with macOS. It is less powerful than ImageMagick but it is always there, which makes it perfect for quick resizes inside a script you do not want to add dependencies to.
I mix them freely. The rule of thumb: sips for a quick resize, ImageMagick
for anything that involves cropping, compositing, or thinking.
Looking before you leap
Before touching an image, find out what it is. Width, height, format:
# ImageMagick
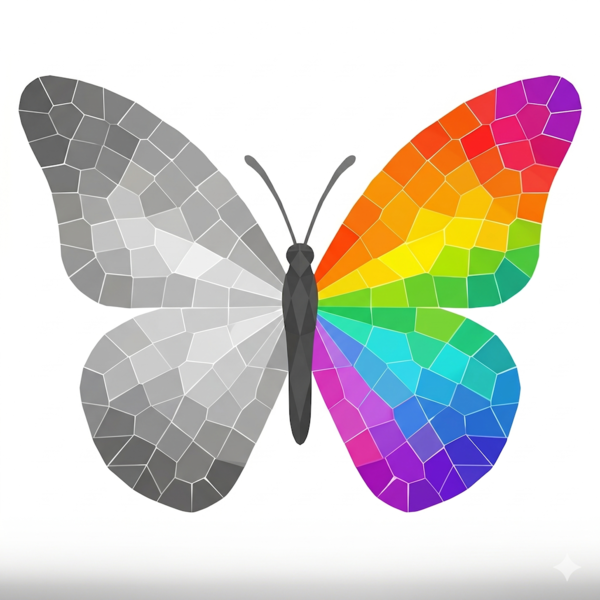
magick identify butterfly.png
# butterfly.png PNG 1024x1024 1024x1024+0+0 8-bit sRGB 1097747B
# sips, on macOS
sips -g pixelWidth -g pixelHeight butterfly.png
That 1097747B at the end is the file size in bytes — just over 1 MB,
which already tells me this image is too heavy for what it is.
Resizing
The single most common operation. Scale the longest side to 600 pixels and keep the aspect ratio:
# ImageMagick: the > means "only shrink, never enlarge"
magick butterfly.png -resize '600x600>' butterfly-600.png

# sips: -Z resizes the longest edge, preserving aspect ratio
sips -Z 600 butterfly.png --out butterfly-600.png
A small trick worth knowing: if you are downscaling something with fine detail, render or resize bigger than you need and then scale down. The extra pixels give the resampler more to average from, so edges come out cleaner. I do this constantly with anything destined for a share card.
Chasing a file size
Here is a problem I actually hit. I wanted this icon to show up as the preview image when the page is shared on WhatsApp. WhatsApp is famously fussy and tends to ignore preview images much over ~300 KB. My PNG was 1 MB.
The fix is mostly resolution. A share thumbnail does not need to be 1024px:
# Drop to 480px and check the new size in one line
sips -Z 480 icon.png --out icon.png
magick identify -format '%B bytes\n' icon.png
# 267516 bytes
That alone took it from 1 MB to 260 KB — comfortably under the limit, with
no visible quality loss at the size it is actually displayed. If you need to
squeeze further without resizing, pngquant --quality=65-90 in.png does
excellent lossy palette compression on PNGs, and for photos a JPEG at
-quality 82 is usually indistinguishable from the original at a fraction
of the size.
Cropping, and using it to inspect
-crop WxH+X+Y cuts a rectangle: width by height, offset X pixels from the
left and Y from the top. The +repage afterwards resets the virtual canvas
so the crop becomes a clean standalone image.
# Pull out a 260x260 square starting at (764, 764) — the bottom-right corner
magick butterfly.png -crop 260x260+764+764 +repage corner.png
I use crop not just to produce final images but to look at things. When I suspected there was a watermark in the corner, I cropped that corner out and blew it up so I could see exactly where it was and how big:

There it is — the little four-point sparkle an image generator stamps in the corner.
The interesting part: removing the watermark
Here is the icon, watermark and all:
The naive approach is to paint a white box over the sparkle. That fails the moment the background is not flat — and this one has a subtle grey gradient toward the edges, so a white patch leaves an obvious bright square.
My first real attempt was to clone a clean patch from just above the sparkle and composite it on top:
magick icon.png \
  \( -clone 0 -crop 140x140+884+744 +repage \) \
  -geometry +884+884 -compose over -composite cleaned.png
Closer, but the patch I copied came from higher up where the gradient is a shade lighter, so it also left a faint square. The background varies vertically, so copying vertically can never match.
The trick that actually worked: the gradient is symmetric left to right,
so the clean bottom-left corner is the perfect donor. Copy it, flip it
horizontally with -flop, and drop it over the bottom-right:
magick icon.png \
  \( -clone 0 -crop 140x140+0+884 +repage -flop \) \
  -geometry +884+884 -compose over -composite cleaned.png
-flop mirrors horizontally (-flip would mirror vertically). Because the
donor is the mirror image of where it lands, the gradient lines up exactly
and the seam disappears:

And the corner, before and after, side by side — the sparkle is gone and you cannot tell anything was touched:

The lesson is less about ImageMagick and more about the approach: when you patch over something, steal from the place whose background already matches. For a symmetric backdrop, the mirror is free.
Bonus: turning an SVG into a PNG
The other thing I did that week was take an SVG favicon and produce a raster share image from it. SVGs are vectors, so you can render them at any size — the move is to rasterise at high density and scale down for clean edges:
magick -background none -density 1200 favicon.svg -resize 1200x1200 robot.png
Then I gave it some breathing room by centring it on a dark card. -extent
grows the canvas to a fixed size and -gravity center keeps the subject in
the middle:
magick robot.png -resize 470x470 \
  -background "#2b2b2b" -gravity center -extent 600x600 card.png
That is the whole pipeline that produced the share image for this very blog, in two commands and no editor.
Why bother
Because it is repeatable. Once a command works, it is in my shell history forever, it goes into scripts, and it runs the same on my laptop as it does in CI. The first time you figure out the incantation it feels slower than dragging sliders. Every time after that, it is a single line you paste and forget. For the boring 90% of image work, that is exactly the trade I want.
This post was written with the help of AI (Claude by Anthropic).